Discord Bot Read a Line From a Text File
This tutorial will show you how to use JavaScript and Node.js to build your own Discord bot completely in the cloud.
You practice not demand to install annihilation on your computer, and y'all do non need to pay anything to host your bot.
Nosotros are going to employ a number of tools, including the Discord API, Node.js libraries, and a deject calculating platform called Repl.it.
If yous'd rather code your discord bot using Python instead of JavaScript, read this tutorial instead.
There is also a video version of this written tutorial. The video is embedded below and the written version is after the video.
How to Create a Discord Bot Account
In lodge to piece of work with the Node.js library and the Discord API, we must kickoff create a Discord Bot account.
Here are the stride to creating a Discord Bot business relationship.
i. Make sure you're logged on to the Discord website.
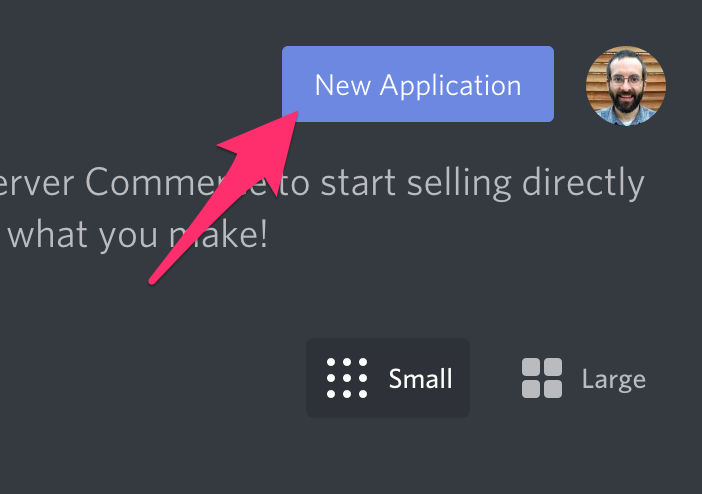
2. Navigate to the awarding folio.
iii. Click on the "New Application" push.
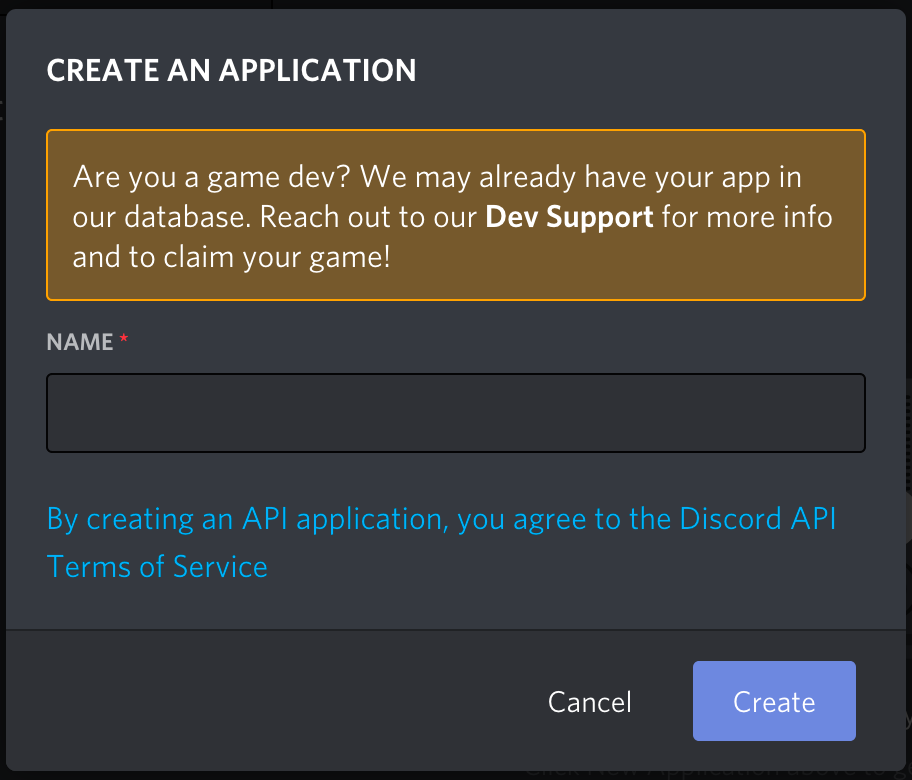
4. Give the application a name and click "Create".
five. Go to the "Bot" tab and so click "Add Bot". You will take to confirm by clicking "Yes, do information technology!"
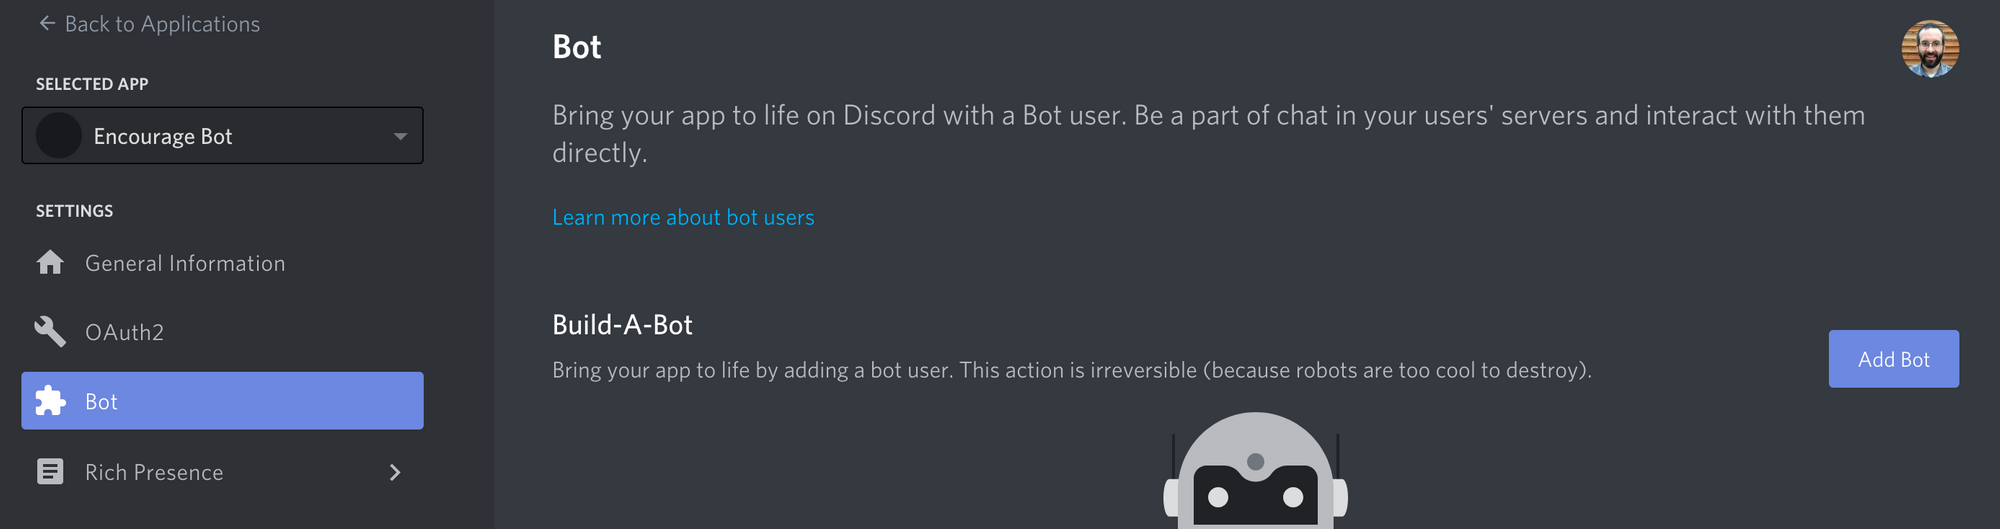
Go on the default settings for Public Bot (checked) and Crave OAuth2 Code Grant (unchecked).
Your bot has been created. The adjacent step is to re-create the token.
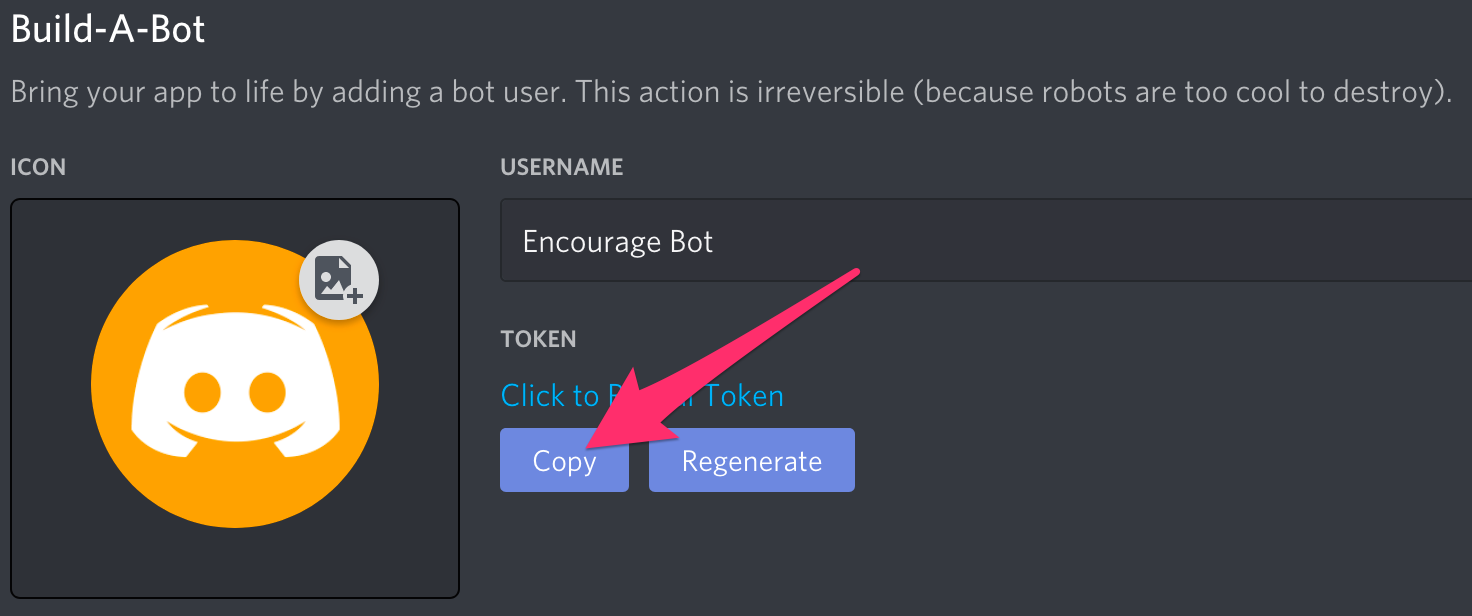
This token is your bot's password so don't share it with everyone. Information technology could allow someone to log in to your bot and do all sorts of bad things.
You can regenerate the token if it accidentally gets shared.
How to Invite Your Bot to Join a Server
At present you lot have to become your Bot User into a server. To practice this, you lot should create an invite URL for it.
Get to the "OAuth2" tab. Then select "bot" under the "scopes" department.
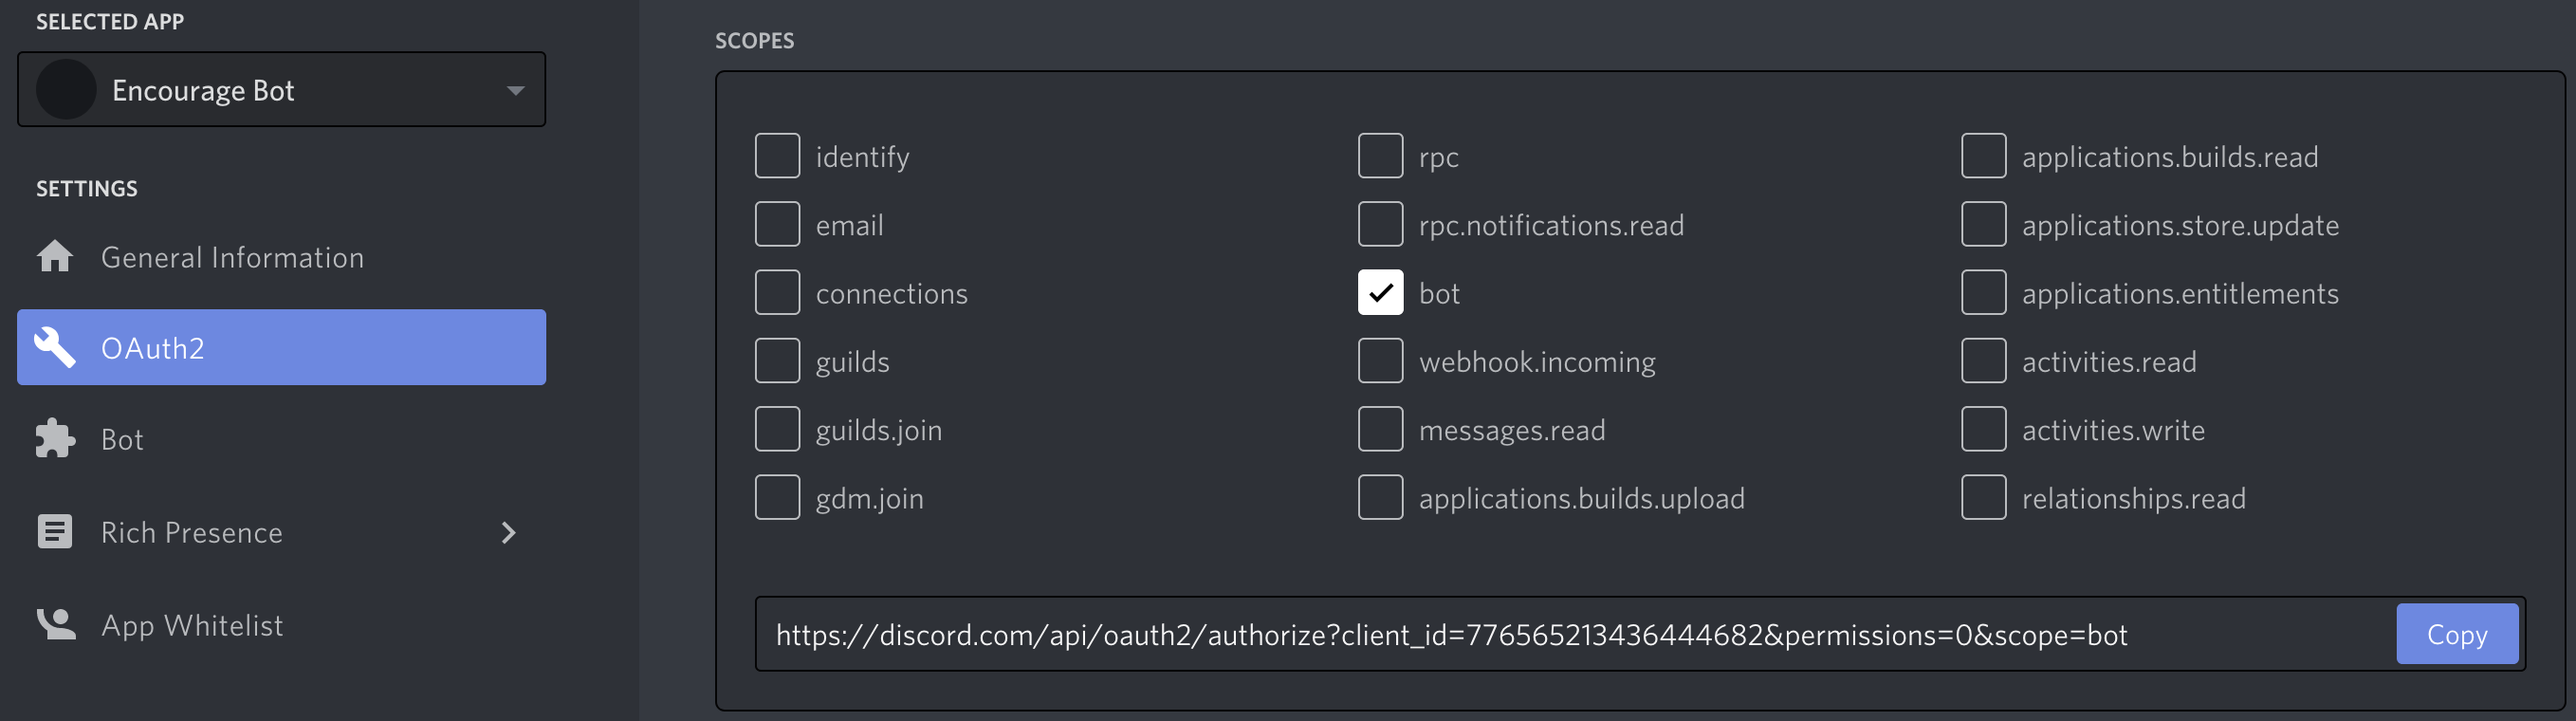
At present choose the permissions y'all desire for the bot. Our bot is going to mainly use text messages so we don't demand a lot of the permissions. You may need more than depending on what you want your bot to practise. Be careful with the "Administrator" permission.
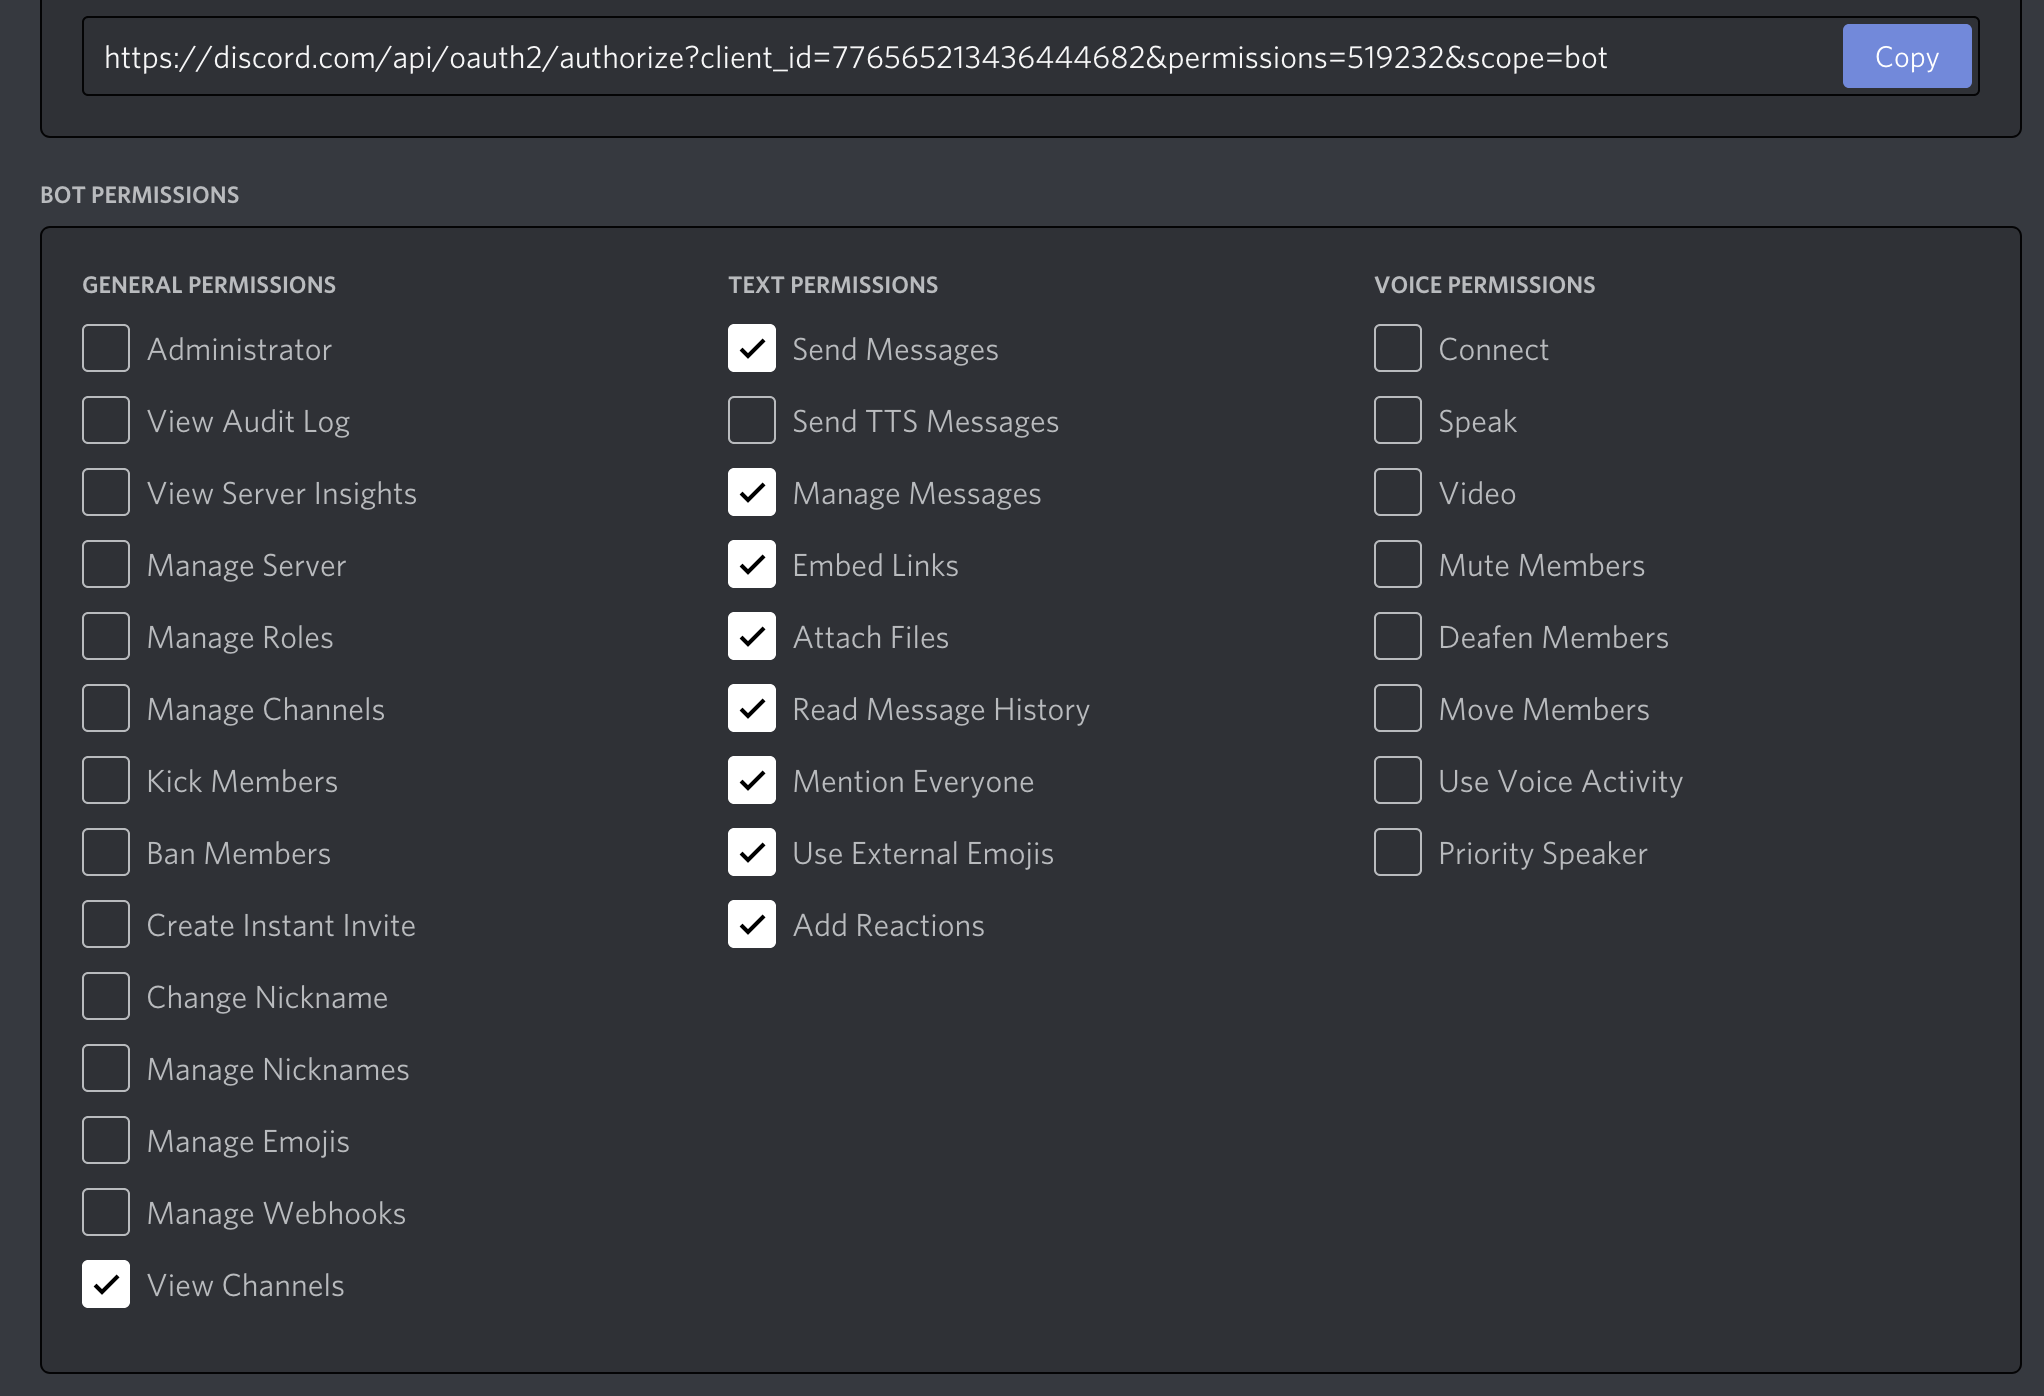
After selecting the advisable permissions, click the 'copy' button above the permissions. That will copy a URL which can be used to add the bot to a server.
Paste the URL into your browser, cull a server to invite the bot to, and click "Authorize".
To add the bot, your business relationship needs "Manage Server" permissions.
Now that yous've created the bot user, we'll start writing the Python lawmaking for the bot.
How to Code a Basic Discord Bot with the discord.js Library
We'll be using the discord.js Node library to write the code for the bot. discord.js is an API wrapper for Discord that makes it easier to create a Discord bot in Node.js / JavaScript.
How to Create a Repl and Install discord.js
Yous can develop the bot on your local computer with any code editor. However, in this tutorial, nosotros'll be using Repl.it considering it will make it simpler for anyone to follow along. Repl.it is an online IDE that you can use in your web browser.
First by going to Repl.it. Create a new Repl and cull "Node.js" as the language. This means the programming linguistic communication volition be JavaScript.
To use the discord.js library, just add const Discord = require("discord.js"); at the summit of primary.js. Repl.information technology volition automatically install this dependency when y'all press the "run" button.
How to Set Up Discord Events for Your Bot
discord.js revolves around the concept of events. An event is something you mind to and so respond to. For example, when a message happens, you will receive an event most it that you tin can respond to.
Let'due south brand a bot that replies to a specific message. This elementary bot code is taken directly from the discord.js documentation. We will be adding more features to the bot later.
Add together this code to main.js. I'll explain what all this code does shortly.
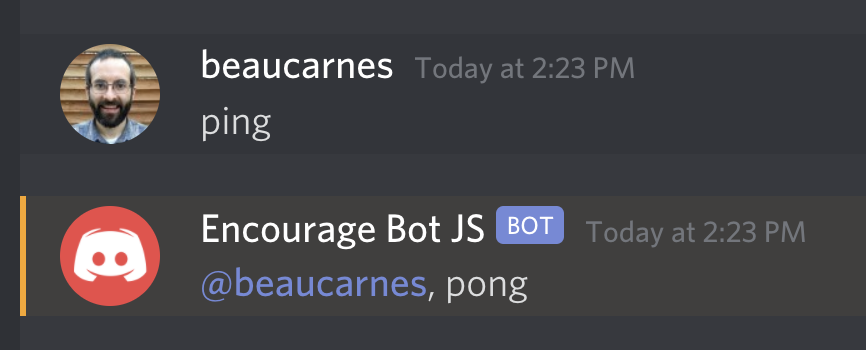
const Discord = require("discord.js") const customer = new Discord.Customer() client.on("set up", () => { console.log(`Logged in equally ${customer.user.tag}!`) }) customer.on("message", msg => { if (msg.content === "ping") { msg.reply("pong"); } }) client.login(procedure.env.TOKEN) When you created your bot user on Discord, yous copied a token. Now nosotros are going to create a .env file to store the token.
.env files are used for declaring environs variables. On Repl.it, virtually files you create are visible to anyone just .env files are merely visible to you. Other people viewing a public repl will not be able to see the contents of the .env file.
Then if y'all are developing on Repl.it, simply include private information similar tokens or keys in a .env file.
Click the "Add file" push and create a file named .env.
Inside the file add together the following line, including your actual token you copied previously:
TOKEN=[paste token here] Now allow'due south go over what each line of code is doing in your Discord bot lawmaking.
The showtime line imports the discord.js library. Adjacent, nosotros create an instance of a Customer. This is the connexion to Discord.
The client.on() is used to check for events. It accepts an event proper name, then a callback function to be called when the result takes place. In this code, the ready event is called when the bot is ready to beginning existence used. And then, when the Discord server has a new bulletin, the bulletin event is called.
The code checks if the msg.content equals 'ping'. If and then, and so the bot replies with 'pong' to the channel.
Now that the bot is prepare up, the last line runs the bot with the login token. It gets the token from out .env file.
Nosotros accept the code for the bot so at present we just take to run it.
How to Run the Bot
Now click run button on the elevation to run your bot in repl.it.
At present get to your Discord room and type "ping". Your bot should return "pong".
How to Improve the Bot
Now that we have a basic bot working, we'll amend information technology. It is called "Encourage Bot" for a reason.
This bot will respond with a bulletin of encouragement whenever someone sends a message containing a deplorable or depressing word.
Anyone volition be able to add encouraging messages for the bot to utilise and the user-submitted messages will be stored in the Repl.it database.
The bot will as well render a random inspirational quote from an API when someone types the message "$inspire" into the chat.
We'll commencement with adding the "$inspire" feature.
How to Add Inspirational Quotes to the Bot
We volition get inspirational quotes from an API chosen zenquotes.io. We demand to import the node-fetch module, add together a getQuote() role, and update our bot code to call the part.
Here is the updated code. After the lawmaking, I'll explain the new parts.
const Discord = require("discord.js") const fetch = crave("node-fetch") const customer = new Discord.Client() function getQuote() { return fetch("https://zenquotes.io/api/random") .then(res => { return res.json() }) .and so(data => { return data[0]["q"] + " -" + information[0]["a"] }) } client.on("set", () => { console.log(`Logged in as ${client.user.tag}!`) }) client.on("message", msg => { if (msg.author.bot) return if (msg.content === "$inspire") { getQuote().then(quote => msg.channel.send(quote)) } }) client.login(process.env.TOKEN) We now accept to import the node-fetch module. This module allows our code to brand an HTTP request to get data from the API.
The getQuote() function is pretty straightforward. Kickoff, information technology uses the node-fetch module to asking data from the API URL. The API returns a random inspirational quote. This function could easily be rewritten to get quotes from a different API, if the current ane stops working.
Then the part converts the response from the API to JSON and creates a cord to return. Through trial and error I figured out how to become the quote from the JSON into the string format I wanted. The quote is returned from the function as a string.
The final part updated in the code is toward the end. Previously information technology looked for the bulletin "ping". Now information technology looks for "$inspire". Instead of returning "pong", information technology gets the quote with getQuote() and returns the quote. We utilise msg.channel.send() to send the message to the channel. Also, the code checks if the bulletin comes from the bot itself and if information technology does, it leaves the function so information technology does not do anything.
At this point y'all can run your code and try it out.
How to Add Encouraging Messages to the Bot
Now we volition implement the characteristic where the bot responds with encouraging messages when a user posts a bulletin with a sad word.
How to Add Sad Words to the Bot
First we need to create an array that contains the distressing words that the bot will respond to.
Add together the post-obit line after the client variable is created:
sadWords = ["sad", "depressed", "unhappy", "angry", "miserable"]
Feel gratis to add together more than words to the list.
How to Add Encouraging Letters to the Bot
Now we'll add an array of encouraging messages that the bot will respond with.
Add the following array after the sadWords list you created:
encouragements = [ "Cheer up!", "Hang in there.", "You lot are a great person / bot!" ] Like before, experience free to add together more phrases of your option to the array . I'm just using 3 items for at present because after nosotros'll add the power for users to add more encouraging phrases for the bot to use.
How to Respond to Messages
Now we need to update our bot to use the two lists nosotros created.
Now we will update the message office to check all messages to see if they contain a word from the sadWords list. If a sad word is institute, the bot will ship a random message of encouragement.
Hither is the updated code:
client.on("bulletin", msg => { if (msg.content === "$inspire") { getQuote().then(quote => msg.aqueduct.send(quote)) } if (sadWords.some(word => msg.content.includes(word))) { const encouragement = encouragements[Math.floor(Math.random() * encouragements.length)] msg.reply(encouragement) } }) This is a expert time to test the bot. You know enough now to create your ain bot. Simply next you lot'll larn how to implement more than advanced features and store data using the Repl.it database.
How to Enable User-submitted Messages
The bot is completely functional, but now let's make it possible to update the bot right from Discord. A user should be able to add more encouraging messages for the bot to use when it detects a sad word.
Nosotros are going to utilize Repl.it's built-in database to store user-submitted letters. This database is a primal-value store that'southward congenital into every repl.
At the top of the code, nether the other import statements, add:
const Database = require("@replit/database") const db = new Database() This will permit united states of america to apply the Repl.it database. When you run the code, Repl.information technology should install the database module automatically. If for some reason it doesn't, you lot may accept to go into the Beat tab (non the Console) and blazon "npm install @replit/database".
Later where the encouragements array is created, insert the following lawmaking to add together the encouragements to the database if needed:
db.get("encouragements").then(encouragements => { if (!encouragements || encouragements.length < 1) { db.set up("encouragements", starterEncouragements) } }) Also, rename the encouragements assortment toward the peak to starterEncouragements.
Users will be able to add custom encouraging letters for the bot to use directly from the Discord conversation. Before we add new commands for the bot, let's create 2 helper functions that will add custom messages to the database and delete them.
Add together the post-obit lawmaking after the getQuote() part:
function updateEncouragements(encouragingMessage) { db.get("encouragements").then(encouragements => { encouragements.push([encouragingMessage]) db.set("encouragements", encouragements) }) } function deleteEncouragment(index) { db.get("encouragements").then(encouragements => { if (encouragements.length > index) { encouragements.splice(index, 1) db.gear up("encouragements", encouragements) } }) } The updateEncouragements() office accepts an encouraging bulletin as an statement.
First it gets the "encouragements" from the database. And so, it adds the new encouragement to the assortment, and stores the updated assortment back in the database under the "encouragements" key.
The deleteEncouragement() function accepts an alphabetize as an argument.
It gets the list of encouragements from the database stored nether the "encouragements" primal. If the length is more the index, then the list item at that index is deleted. Finally, the updated list is stored dorsum in the database under the "encouragements" key.
Hither is the updated code for the bulletin function. Afterwards the code, I'll explain the new sections.
client.on("message", msg => { if (msg.content === "$inspire") { getQuote().and then(quote => msg.aqueduct.send(quote)) } if (sadWords.some(give-and-take => msg.content.includes(word))) { db.get("encouragements").then(encouragements => { const encouragement = encouragements[Math.floor(Math.random() * encouragements.length)] msg.reply(encouragement) }) } if (msg.content.startsWith("$new")) { encouragingMessage = msg.content.split("$new ")[1] updateEncouragements(encouragingMessage) msg.channel.send("New encouraging bulletin added.") } if (msg.content.startsWith("$del")) { alphabetize = parseInt(msg.content.split("$del ")[1]) deleteEncouragment(index) msg.channel.send("Encouraging message deleted.") } }) The sad words section has been updated to employ the encouraging letters from the database and then user submitted letters can be used.
The next new department of lawmaking is used to add a new user-submitted message to the database. If a Discord message starts with "$new", so the text later "$new" will exist used as a new encouraging bulletin.
The code msg.content.split('$new ')[ane] splits off the message from the "$new" control and stores the message in a variable. In that line of code, accept note of the infinite in '$new '. Nosotros want everything after the infinite.
We phone call the updateEncouragements helper function with the new message, and so the bot sends a bulletin to the discord conversation confirming that the message was added.
The third new section (at the end of the code above) checks if a new Discord message starts with "$del". This is the command to delete an particular from the "encouragements" listing in the database.
The index is split off from the Discord bulletin starting with "$del". Then, the deleteEncouragement() function is called passing in the index to delete. The updated list of encouragements is loaded into the encouragements variable, and then the bot sends a message to Discord with the current list.
Final Bot Features
The bot should work so this is a proficient time to exam it. We will now add a few final features.
We will add together the ability to get a list of user-submitted letters right from Discord and we will add together the ability to turn off and on whether the bot responds to sad words.
I will requite you lot the full final lawmaking of the program, and then I'll discuss the updates below the code.
const Discord = require("discord.js") const fetch = require("node-fetch") const Database = require("@replit/database") const db = new Database() const client = new Discord.Client() const sadWords = ["distressing", "depressed", "unhappy", "aroused", "miserable"] const starterEncouragements = [ "Cheer upward!", "Hang in there.", "You are a great person / bot!" ] db.get("encouragements").and then(encouragements => { console.log(encouragements) if (!encouragements || encouragements.length < 1) { db.gear up("encouragements", starterEncouragements) } }) db.go("responding").and then(value => { if (value == null) { db.ready("responding", truthful) } }) role getQuote() { render fetch("https://zenquotes.io/api/random") .then(res => { return res.json() }) .then(data => { return data[0]["q"] + " -" + data[0]["a"] }) } role updateEncouragements(encouragingMessage) { db.become("encouragements").then(encouragements => { encouragements.push([encouragingMessage]) db.prepare("encouragements", encouragements) }) } part deleteEncouragment(index) { db.become("encouragements").then(encouragements => { if (encouragements.length > index) { encouragements.splice(index, i) db.set("encouragements", encouragements) } }) } customer.on("set", () => { console.log(`Logged in every bit ${client.user.tag}!`) }) client.on("bulletin", msg => { if (msg.content === "$inspire") { getQuote().then(quote => msg.channel.send(quote)) } db.become("responding").and so(responding => { if (responding && sadWords.some(give-and-take => msg.content.includes(word))) { db.go("encouragements").then(encouragements => { const encouragement = encouragements[Math.flooring(Math.random() * encouragements.length)] msg.answer(encouragement) }) } }) if (msg.content.startsWith("$new")) { encouragingMessage = msg.content.split("$new ")[1] updateEncouragements(encouragingMessage) msg.channel.transport("New encouraging message added.") } if (msg.content.startsWith("$del")) { index = parseInt(msg.content.split("$del ")[i]) deleteEncouragment(index) msg.channel.transport("Encouraging message deleted.") } if (msg.content.startsWith("$list")) { db.get("encouragements").so(encouragements => { msg.aqueduct.send(encouragements) }) } if (msg.content.startsWith("$responding")) { value = msg.content.dissever("$responding ")[one] if (value.toLowerCase() == "true") { db.set("responding", truthful) msg.channel.ship("Responding is on.") } else { db.set("responding", false) msg.aqueduct.send("Responding is off.") } } }) client.login(process.env.TOKEN) The first section added to the code is right under the starterEncouragements list:
db.get("responding").then(value => { if (value == null) { db.set("responding", true) } }) We create a new key in the database called "responding" and set information technology to "truthful". We'll apply this to determine if the bot should respond to sorry words or not. Since the database is saved even afterwards the plan stops running, nosotros only create the new cardinal if it doesn't already exist.
The next new part of the code is in the section that responds to sad words is now within this if statement. The bot will only reply to sad words if db.get("responding") = truthful. The ability to update this value comes after this next section.
Next, afterwards the code to brand the bot respond to the "$del" command, there is new code to respond to the "$list" control when sent as a Discord message.
The bot sends the list of encouragements as a Discord message.
The terminal new department comes next. This code makes the bot answer to the "$responding" control. This command takes an statement of either "true" or "false". Here is a usage example: "$responding truthful".
The lawmaking kickoff pulls off the argument with value = msg.content.split("$responding ")[1] (similar before, annotation the space in "$responding "). Then in that location is an if/else statement that appropriately sets the "responding" central in the database and sends a notification message dorsum to Discord. If the argument is annihilation but "truthful", the lawmaking assumes "false".
The code for the bot is complete! You can now run the bot and try it out. But in that location is one more than important footstep that we will talk over side by side.
How to Set up Upwardly the Bot to Run Continuously
If you run your bot in repl.information technology and so close the tab it is running in, your bot will stop running.
But there are 2 ways you can go on your bot running continuously, even after you close your web bowser.
The offset mode and simplest mode is to sign up for paid plan in Repl.it. Their cheapest paid plan is chosen the Hacker Plan and it includes five always-on Repls.
You tin get iii months gratis using this link (limited to beginning 1000 people): https://repl.it/merits?code=tryalwayson2103
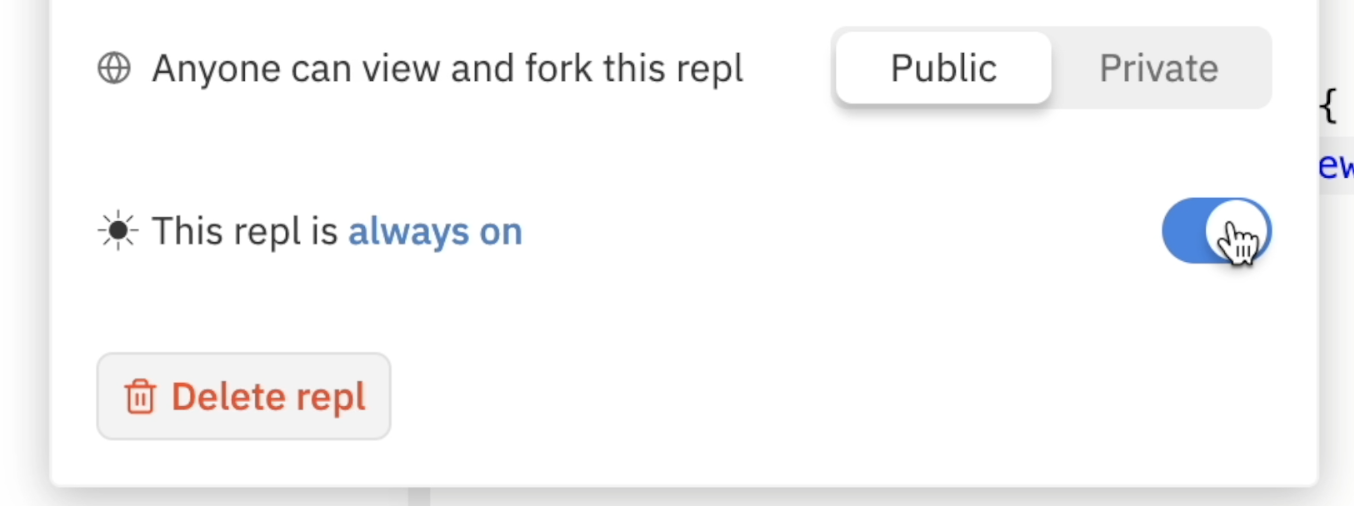
Once you lot take signed up for that program, open your Repl and click the name at the elevation. Then select the "Always On" selection.
There is some other way to go on your lawmaking running even on the free tier but it is a little more complicated. Repl.it will continue running a spider web server fifty-fifty later on the tab is airtight. But even a web server will only run for upwards to an 60 minutes without any use.
Hither is what the repl.it docs say:
Once deployed, the server volition proceed to run in the background, even after you lot close the browser tab. The server will stay awake and agile until an hr subsequently its terminal request, after which it will enter a sleeping stage. Sleeping repls will be woken upward equally presently as it receives another asking; there is no need to re-run the repl. However, if you make changes to your server, you will need to restart the repl in society to see those changes reflected in the live version.
To keep the bot running continuously, we'll employ another free service called Uptime Robot at https://uptimerobot.com/.
Uptime Robot tin can exist set up upwards to ping the bot'south spider web server on repl.it every 5 minutes. With constant pings, the bot volition never enter the sleeping phase and will only keep running.
And so we accept to do two more than things to go our bot to run continuously:
- create a web server in repl.information technology and
- fix upwardly Uptime Robot to continuously ping the web server.
How to Create a Spider web Server in repl.it
Creating a spider web server is simpler than yous may think.
To practise it, create a new file in your project called server.js.
Then add together the following code:
const limited = require("express") const server = express() server.all("/", (req, res) => { res.send("Bot is running!") }) office keepAlive() { server.listen(3000, () => { console.log("Server is set.") }) } module.exports = keepAlive In this lawmaking, we utilise express to start a web server. The server returns "Bot is running!" to anyone who visits it. The server volition run on a separate thread from our bot. We won't hash out everything here since the residuum is non actually relevant to our bot.
Now we merely need the bot to run this web server.
Add the following line toward the top of alphabetize.js to import the server.
const keepAlive = require("./server") To start the web server when index.js is run, add the following line as the second-to-final line, correct earlier the bot runs.
keepAlive()
When you run the bot on repl.it later calculation this code, a new web server window will open upwardly. There is a URL shown for the web server. Copy the URL so you can use it in the next department.

How to Fix Uptime Robot
At present we need to prepare Uptime Robot to ping the web server every five minutes. This will cause the bot to run continuously.
Create a gratuitous account on https://uptimerobot.com/.
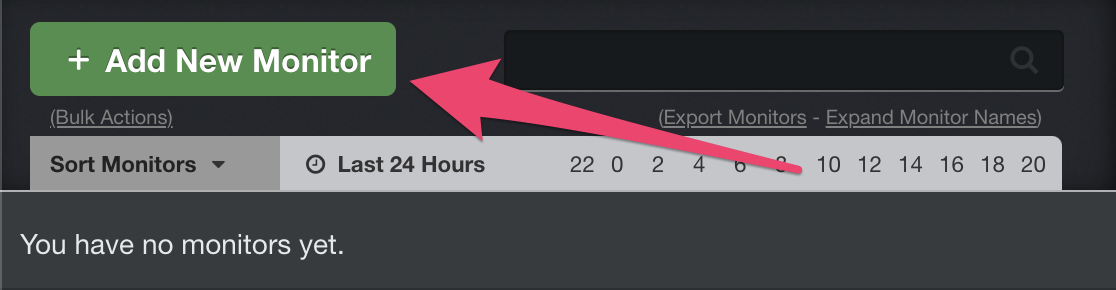
In one case you are logged in to your account, click "Add New Monitor".
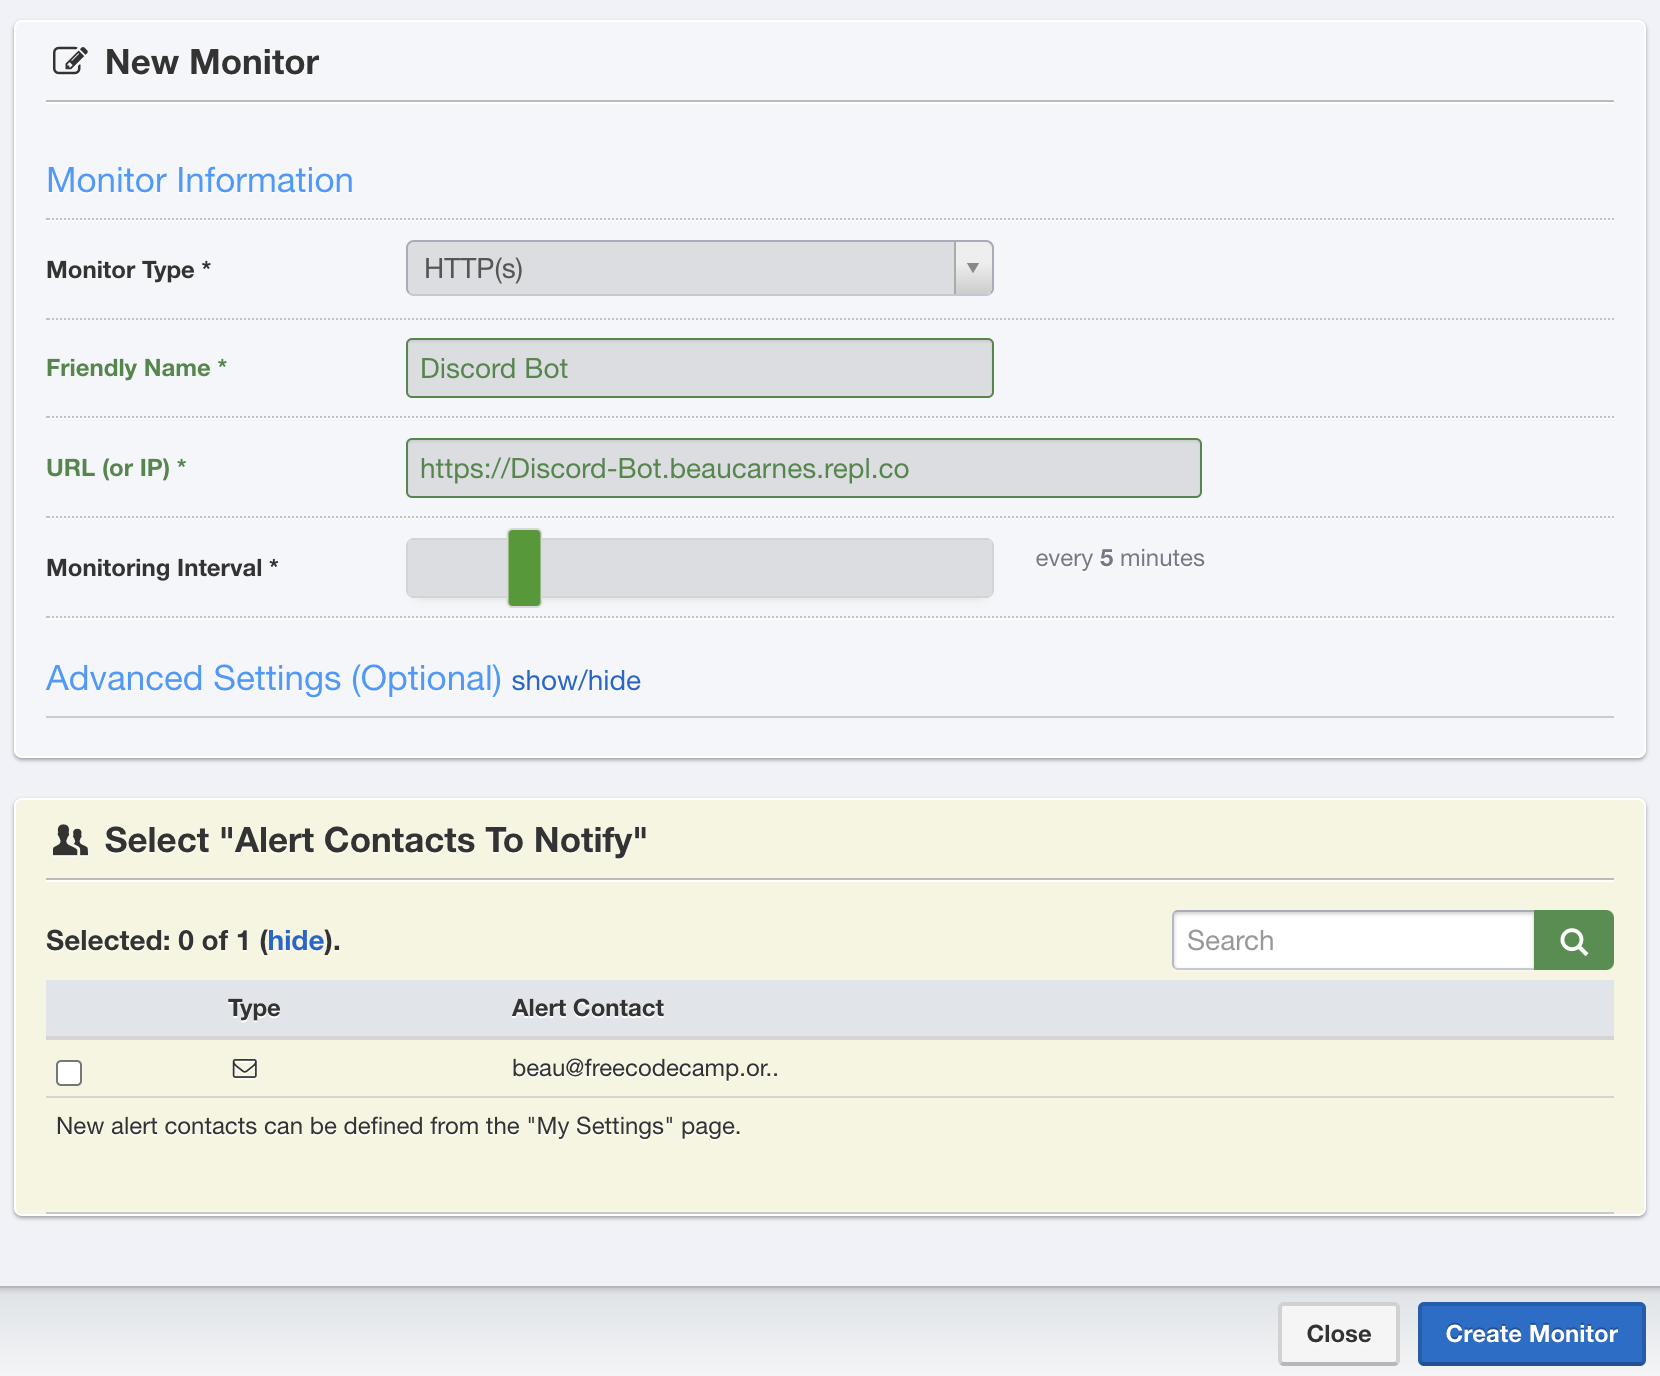
For the new monitor, select "HTTP(southward)" as the Monitor Type and proper noun it whatever you lot similar. And so, paste in the URL of your web server from repl.it. Finally, click "Create Monitor".
We're done! Now the bot will run continuously and so people tin can always collaborate with information technology on Repl.it.
Conclusion
You now know how to create a Discord bot with JavaScript, and run information technology continuously in the cloud.
In that location are a lot of other things that the discord.js library tin can do. Then if you want to give a Discord bot even more features, your next pace is to bank check out the docs for discord.js.
Learn to code for free. freeCodeCamp's open source curriculum has helped more than 40,000 people get jobs every bit developers. Become started
Source: https://www.freecodecamp.org/news/create-a-discord-bot-with-javascript-nodejs/
0 Response to "Discord Bot Read a Line From a Text File"
Post a Comment